---
title: "JavaScript SDK | Veriff.com"
slug: "javascript-sdk-1"
description: "Create web-based verification sessions with customizable front-end flows."
updated: 2025-03-07T13:37:38Z
published: 2025-03-07T13:37:38Z
canonical: "devdocs.veriff.com/javascript-sdk-1"
---
> ## Documentation Index
> Fetch the complete documentation index at: https://devdocs.veriff.com/llms.txt
> Use this file to discover all available pages before exploring further.
# JavaScript SDK
The **purpose** of the JS SDK is to **create the session URL** for your end-user's verification session.
Veriff JS SDK is a simple and customizable library, making it a convenient way to include Veriff's **web flow** to your solution.
Once you have the session URL, you have two options to direct the user to the verification flow:
- Use the [redirect](/v1/docs/redirection-guide-1) solution
- Trigger the [InContext SDK](/v1/docs/incontext-sdk-1) solution
## Requirements and prerequisites
### Prerequisites
- You have an active account with Veriff (see the [Getting Started](/v1/docs/getting-started) section)
- You have an integration with Veriff (see the [Getting Started](/v1/docs/getting-started) section)
- You have set up webhook(s) to get replies from Veriff (see the [Webhooks](/v1/docs/webhooks-guide) section)
- Make sure you have the integration’s API key at hand (see [API Documentation and reference](https://devdocs.veriff.com/apidocs) for where to find these)
---
## Add SDK to the project
### **Step 1: Install the JS SDK**
Either as a script tag
```javascript
```
Or, via package manager:
```javascript
$ npm install --save @veriff/js-sdk
```
```javascript
// CommonJS
const Veriff = require('@veriff/js-sdk');
// ES6 style import
import { Veriff } from '@veriff/js-sdk';
```
### **Step 2: Add the JS SDK**
Add a parent element in HTML
```xml
```
It is possible to set the width of js-sdk form through style attribute:
```xml
```
### **Step 3: Add viewport meta tag**
The **viewport meta tag** is crucial for proper rendering and layout on mobile devices. If this meta tag is missing, the website may be rendered too small on mobile devices.
Make sure to add the following tag to mitigate such issues:
```xml
```
---
## Start the verification flow
Initialize the library and define what happens when a verification session is started.
In order to initialize the library, you need the following functions: `API Key`, `parentId` and `onSession` callback function.
Functions are defined as below.
| Function | Description |
| --- | --- |
| `apiKey`* | This is your integration’s **API key**. See the [API Documentation and reference](https://devdocs.veriff.com/apidocs) for instructions where to find the integrations API key |
| `parentId`* | Value is `veriff-root` |
| `onSession`* | Defines what happens when the verification session is started: - the end-user is [redirected](/v1/docs/redirection-guide-1) to the verification url, or - the [InContext SDK](/v1/docs/incontext-sdk-1) is triggered |
* Required parameter
```javascript
const veriff = Veriff({
apiKey: 'API_KEY',
parentId: 'veriff-root',
onSession: function(err, response) {
// received the response, verification can be started / triggered now
// redirect
window.location.href = response.verification.url;
// incontext sdk
createVeriffFrame({url: response.verification.url});
}
});
veriff.mount();
```
With this, three things are happening:
1. A front-end view of the verification session is generated, which will allow the end-user to enter their data and get verified
2. In the back, an API call is made
3. Once the API response is received, the `onSessions` function is executed
### The front-end view
In the front-end, the end-user will see the following:
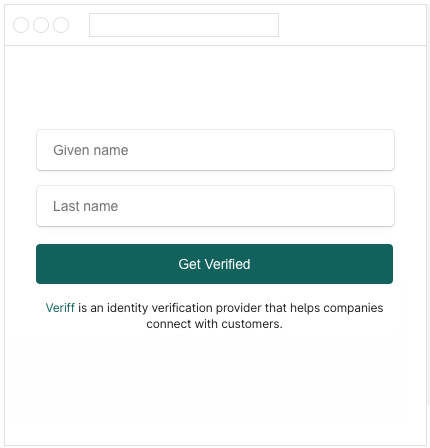
The end-user needs to fill in the input fields and press the button to start the verification session.
It is possible to **customize** the front-end web flow text fields and the text on the button. It is also possible to **remove all input fields** from the view. See the [Customize the SDK](/v1/docs/javascript-sdk-1#customize-the-sdk) section below for more info.
### The API call
The **response body** contains a verification object with following schema:
```json
{
"status": "success",
"verification": {
"id": "UUID V4 identifying the verification",
"url": "full url to which a person should be redirected in order to proceed with verification flow",
"host": "hostname",
"status": "status of the verification",
"sessionToken": "JWT encoded verification token"
}
}
```
### The `onSession` function
It is executed after the response has been received from the API call (see the section above).
1. If you decide to redirect the end-user to the verification flow, see the [Redirection Guide](/v1/docs/redirection-guide-1) for more info
2. If you decide to use Veriff’s modal based approach, see the [InContext SDK](/v1/docs/incontext-sdk-1) section for more info
---
## Customize the SDK
> [!NOTE]
> SDK customization is optional
It is possible to customize the fields of the verification web view flow that is shown to the end-user.
#### Customize input fields and the launch button
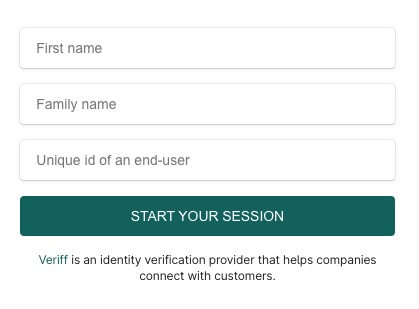
The text values of the input fields and the button can be customized:
```javascript
const veriff = Veriff({
apiKey: 'API_KEY',
parentId: 'veriff-root',
onSession: function(err, response) {
// received the response, verification can be started now
}
});
veriff.mount({
formLabel: {
givenName: 'First name',
lastName: 'Family name',
vendorData: 'Unique id of an end-user'
},
submitBtnText: 'START YOUR SESSION',
loadingText: 'Please wait...'
});
```
With such values, the following prompt is rendered:
#### Disable input fields
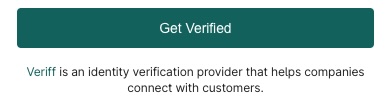
It is possible to **disable the rendering of input fields** (so that the end-users themselves do not need to pass any data) by not including anything in the corresponding values:
```javascript
const veriff = Veriff({
apiKey: 'API_KEY',
parentId: 'veriff-root',
onSession: function(err, response) {
// received the response, verification can be started now
}
});
veriff.setParams({
person: {
givenName: ' ',
lastName: ' '
},
vendorData: ' '
});
veriff.mount({
submitBtnText: 'Get verified'
});
```
With such values, the following prompt is rendered:
#### Pass data yourself and disable input fields
In case the `givenName` or `lastName` or `vendorData` or all of them are known, they can be passed to the SDK, therefore the text input fields will not be rendered.
```javascript
const veriff = Veriff({
apiKey: 'API_KEY',
parentId: 'veriff-root',
onSession: function(err, response) {
// received the response, verification can be started now
}
});
veriff.setParams({
person: {
givenName: 'Foo',
lastName: 'Bar'
},
vendorData: '7eb19312-79d6-11ec-90d6-0242ac120003'
});
veriff.mount({
submitBtnText: 'Get verified'
});
```
With such values, the following prompt is rendered:

## Related
- [Create verification session](/how-to-generate-sessions-manually.md)
- [Intro to the API](/quick-guide-of-idv-using-the-api.md)
- [Webhooks Guide](/webhooks-guide.md)
- [Backwards compatible changes](/backwards-compatible-changes.md)
- [InContext SDK](/incontext-sdk-1.md)
- [Redirection Guide](/redirection-guide-1.md)